Import from CSV
In Open Contacts, data fields are grouped in sections, therefore, You need to define the mapping between CSV data columns and Open Contacts data fields. The mapping will be saved in an XML file. If you have Excel files, please save them as CSV files before proceeding.
Step 1: Analyze the CSV file
You can use either a text editor or MS Excel to view the CSV file.
If you use a text editor, the file might look like the following example exported from Mozilla Thunderbird.
If you use MS Excel, the file might look like the following screenshot.


Step 2: Define the mapping between columns of the CSV file and Fields of Open Contacts
Run command [Main menu -> Tools -> Import -> CSV -> Add CSV Import Template], you will get the following window.
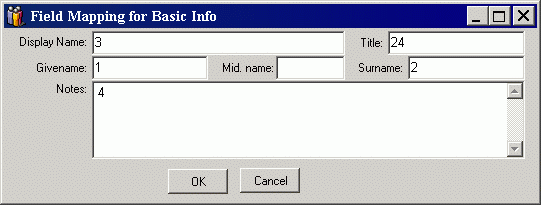
In this example, column 3 will be mapped to field "Display Name", column 1 to "Givenname", and column 24 to "Title" etc. After pressing OK you may map columns into fields of sections.
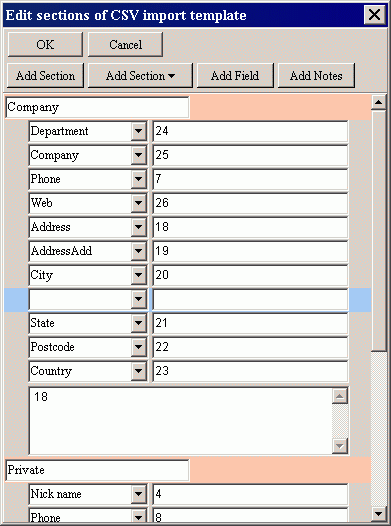
In this window, you will add sections and fields as you can do in the edit window of a contact. The difference is, that you input the numbers of columns in the CSV file. To remove/ignore a field/section, you may simply clear the field/section name. You may then press OK to save the settings into an XML file.
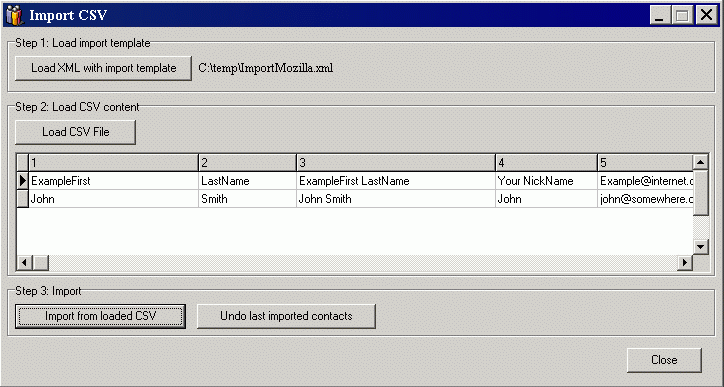
Step 3: Import from the CSV with predefined mapping
a) Run command [Main menu -> Tools -> Import -> CSV -> From CSV], you will get the following screen.
b) Firstly load the XML file with predefined mapping,
c) Load the CSV file,
d) Click on the "import" button.
e) After importing contacts, optionally assign categories to imported contacts through the "Define Categories" popup.
Remarks
If you find something wrong, or want to re-import the CSV file, you can undo last imported contacts.